I think it is fair to say we’ve all had enough Zoom meetings to last us a lifetime.
It stands to reason then that if you’re going to share a recording of your meeting, it’s vital to step away from this tired format. No audience is going to thank you for a viewing experience that sounds like it was recorded in a fish tank and looks like it was captured on Nokia’s first camera phone.
That’s not to say that sharing recordings is not a fine idea. After all, the opportunity to get multiple experts together to share their knowledge is a powerful source of quality content.
But if the content is valuable, surely it deserves to be captured and shared in the highest quality possible? And here’s the rub…
TV, notably news outlets, have really upped their game since the start of the pandemic. They’ve figured out ways to give their remote contributors high-quality cameras to ensure split and full-screen clips that look so much better than your average zoom meeting.
This does not have to be limited to broadcast television; there are simple ways to capture important online business meetings in much higher quality.
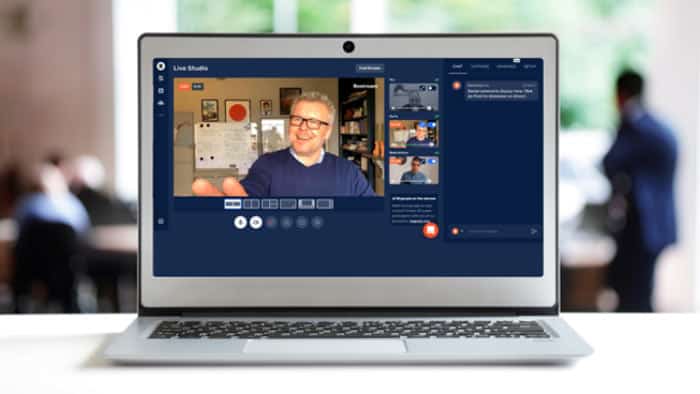
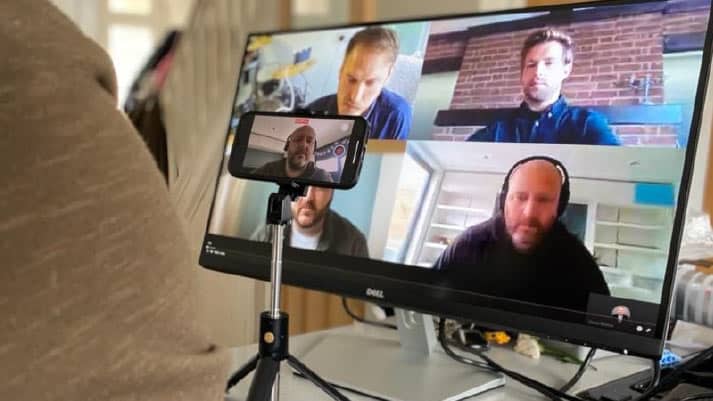
Taking them from this…

To this…

How to do it…
Step 1 – Setting up the meeting
First, we will be using an alternative platform to Teams and Zoom called Restream.
Restream is a platform very similar to Zoom/Teams but crucially has some user friendly and intuitive control features that mean the producer can manually switch between who is on-screen during the conversation. It works in a similar way to how a TV producer switches the live feed from camera 1 to camera 2 during a live broadcast.

This level of control allows you to capture a full-screen recording of the person speaking instead of a split-screen. This is excellent news when it comes to editing your final video; cropping into a split-screen speaker makes already low-quality footage look even worse.
Critically the platform also records the meetings automatically, meaning that nobody needs to remember to hit record! Invaluable!
Step 2 – Recording in HD
Getting high-quality footage is actually very easy. It is simply a case of asking each attendee to film themselves with a high-quality camera and microphone, which they position by their main screen and look at during the meeting. It’s important they look at the high-quality camera and not at the screen where the meeting is happening.
Once the meeting ends, they then need to send their high-quality footage to the video editor, along with the Restream recording, which can then be synchronized together and edited into a high-quality video.
The tech you need…
When it comes to the tech needed to film in high-quality, there are a few ways to do this. And, of course, there are pros and cons to each…
Your smartphone
Everyone has a mobile capable of shooting higher quality video and audio than any laptop webcam. These tend to be low quality to start with, made all the worse by Zoom compressing it for upload, and then compressing it again as it is streamed to everyone else in the meeting.
All you need to do is put your phone into selfie video mode and stand it on a smartphone tripod or perched on a bookshelf. All it needs to do is hold your phone stable and increase the height level akin to your webcam level.

I have an iPhone 11, and boy, the front camera and inbuilt microphone record in absolutely excellent quality! This makes them perfectly acceptable for filming online meetings (just make sure you have a full charge and plenty of storage space). If the meeting is longer than 15 mins, I‘d recommend recording in 1080p and not 4k to ensure you do not run out of space mid-session.
Here’s a video I made earlier that is not only about how to film a video of yourself but was actually shot on an iPhone. you can see for yourself just how much better the quality of footage is compared to a recorded Zoom meeting…
Sending the footage for production…
Android phones: Pop out your SD card, insert it into your computer and transfer the files to the video editor with something like We Transfer (free up to 2Gb at a time).
iPhone: You could plug your phone into your computer, but if you don’t use an original Apple Lightning Cable, the video files will not transfer. No matter how long you try, how much you Google and how much you swear. They. Just. Won’t. Go.
The easiest way to send video files from an iPhone is via a free app called Filemail. As I say, this is free, but you can only send 2 transfers per 24 hours. I like this app because you can just leave the file uploading, then once it reaches 100%, you get a URL that you can then email to the video editor. The file size limit is a whopping 5GB.
The Pros…
- It is virtually free, you have a mobile already, and you can buy a smartphone tripod on Amazon for less than £15.
The Cons…
- iPhone storage is fixed
- Android devices can extend storage space by using SD Cards.
- Sending the file from an iPhone is a real faff.
Webcam & USB Microphone
An external webcam and microphone can help make all your online meetings look and sound a lot better, but when it comes to recording sessions, they can take the quality to the same level as a smartphone.
The process this time is reversed.
This time you will still run the meeting through Restream, but participants will attend through their mobiles or tablets. This is because you cannot participate in a meeting and use your PC to record local footage simultaneously – they must be done on separate devices.
Thankfully Windows is here to help. On your PC, you open a Windows program from the start menu called ‘Camera’. Switch to video mode and hit record (it really is that simple).
Your PC will then record a video file with both high-quality video and audio. Hint: Remember to look at your external webcam throughout the meeting!
Sending the footage to production…
This is really easy:
- Simply stop recording, and a thumbnail will appear at the bottom right.
- Click on this, and it will take you to the gallery with all your other photos and videos.
- Now right-click on the video thumbnail and select ‘Open In File Explorer’, and a folder with your video file will open.
You can now send the file to your video production team (Eyeful are here to help!) using a tool like We Transfer as long as it is under 2GB. Other file transfer websites can send much larger files for a small fee.
The Pros…
- It is easy for people to record themselves.
- The quality is excellent.
- It is much less of a faff to find and send the files compared with an iPhone.
The Cons…
- The equipment cost can spiral if being purchased for multiple participants.
Real-life experiences…
We first started looking into how to shoot high-quality online meetings when our own ‘In Conversation’ video series went from professional video shoots to online meetings. It was essential to Eyeful as a business to continue to strive for perfection.
We quickly identified that the easiest way to achieve this was by running meetings on Teams / Zoom on laptops and having each participant film themselves on their mobile phones.
The truth is, it hasn’t always been easy to encourage everyone that it is worth the extra effort…
Take a recent example of a new ‘In Conversation’ video project using Restream…
We set up the meeting between the two participants to discuss an upcoming event. It’s a great example of what can go well…and what can go wrong.
Before the meeting, it was decided…
- We would run the meeting over Restream
- I would produce it and cut between each person when they spoke on Restream.
- Our interviewer would record high-quality footage on his webcam and USB mic whilst ‘attending’ the meeting on his mobile phone.
- The interviewee would use his external camera and USB mic but at the last minute decided not to use his mobile (I still don’t know why!).
After the meeting, our fears were confirmed. The interviewee’s high-quality recording had corrupted. If only he had also had his mobile!
The finished result is acceptable (and will be shared via our blog very soon), but it could have been so much better…
So, to summarize…
Our advice is simple. If you are delivering an important online presentation or meeting, treat it with the respect it deserves – record and produce it in high quality.
…and remember, this isn’t about simply making a high-definition video because it’s cool and looks better. Every project should be about providing your audience with an experience that they will stay engaged with, enjoy and ultimately take action from.
As with presentations, focus on the end result and your audience’s experience, and you won’t go far wrong.


